

The area I envisioned for the trout pond, however, was adjacent to the marsh and was a snow covered channel, just south of where we considered building the house. What was under that snow and ice at this location we did not know.
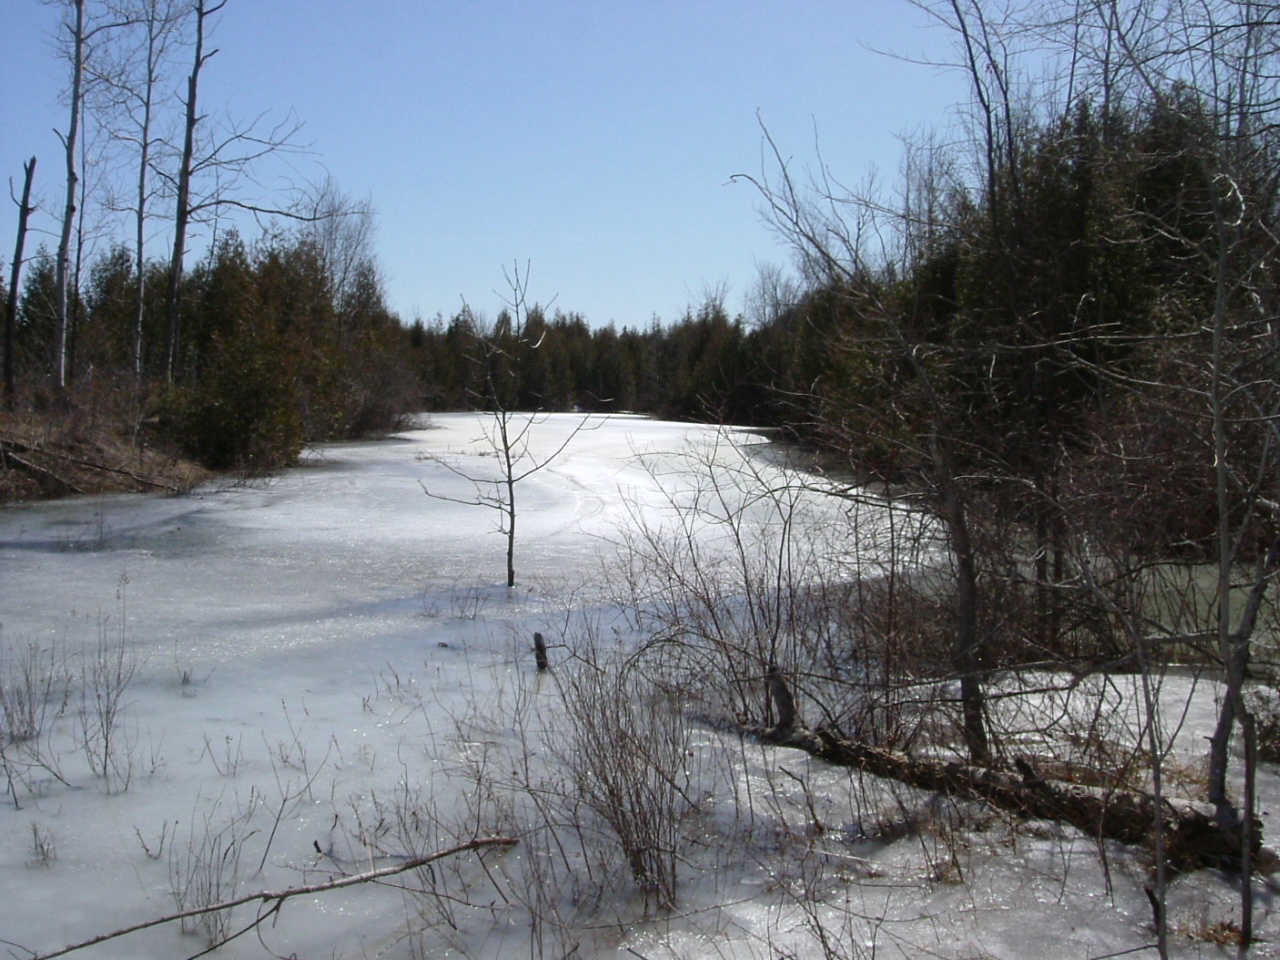
When spring arrived, we could see that there was some water there after the melt, but is was very shallow at about 2 feet of depth. Still, I was pleased that some water had accumulated there, which gave me hope for ultimately making a pond in that location. The reason for this area holding some water was because years earlier, when the road engineers were building the highway along the west boundary of our property, they stripped ours and all of the neighboring properties of their shale for making the road bed. This involved pushing the shallow top soil off to the side from those shale areas, forming a berm to the right side of this picture, and then extracting the 2 feet depth of small shale stones that lay beneath the shallow soil (left by the glacial activity 10,000 years ago). Apparently the original 'real' deep topsoil from our area at that earlier time was pushed to Syracuse, New York by the glacier!
By mid-July, the water had largely disappeared, but earlier there had been enough water to support cattails.

This outcome was sufficiently encouraging to help me decide that I would chance the project and dynamite a 'pond' at that location. By September, it was completely dry, but I was not deterred. Note the berm at the right side of the area, which is about 4 feet above the limestone plate that forms the base of that previously wet area.

At this point I hired my neighbor, Danny O'Grady, who has big equipment, to begin to prepare the pond area that I had outlined, so that the blasting company could hopefully create a real pond, and not just a gravel pit!!! In the picture below you see Danny beginning to level up the berm. Then he started cleaning up the area below the berm at the shale-limestone surface.
At this time, the limestone surface largely has been prepared for the blasting folks.
(after)

To achieve the desired outcome, the blasters drilled holes to the various depths in the limestone according to my pond plan. The south one third of the pond was to be 6 feet deep, while the north end nearest to the ultimate house location was to be 20 feet deep. I felt 20 feet in depth should give the pond sufficient depth to create a thermocline (temperature break), where the trout could survive a hot summer by living on the cooler bottom below the thermocline, and survive the winter months by having a large aerated volume of water to endure about 5 months without much new aerated water -- at least that was the plan. Below you see a drilled hole that was stuffed with dynamite, and then capped (in the next picture).


Below, you can see from the mounds of limestone dust from the hole drilling how closely they were placed to achieve the desired explosive outcome to completely dislodge the limestone at the appropriate depth. All the dynamite was interconnected with wires that were then triggered to to explode simultaneously. At the very bottom of the picture, you can see broken limestone where they had previously blasted the south end of the area. I am standing on the top of that blasted pile to take the picture. The car and the open area at the top of the picture is the beginning of a yard where the house will be built.

A similar view in the opposite direction shows the drilling dust piles leading up to the giant mound of stone on which I was previously standing to take the last picture. What I had not anticipated, nor had anyone else not familiar with blasting, is how much limestone will be generated by a 20 foot deep explosion. Apparently (and obviously true), if you blast 20 feet of solid stone, you will end up with ~20 more feet of stone above that surface level. Interestingly, the blasted stone does not end up flying all over the country side, but rather goes straight up and straight back down. It is 20 feet above the ground surface because of the air and space that now is associated with the dislodged stone. But still, a very concentrated stone pile.

As the final blast was at the north end near to-be the house location, the 'road' you can see to the blast area now runs right to the edge of the stone pile and stops.

How would you like to remove this stone by hand - like the builders of the Rideau canal had to do ~200 years ago? This is just another view of the pile from up close.

The stones are beautiful and well designed to be used for building, if that was your thing. My thing, however, was to remove the stone as soon as possible to see what we had achieved. The picture below shows how the dynamited limestone often breaks away leaving smooth and relatively straight walls -- but not always.

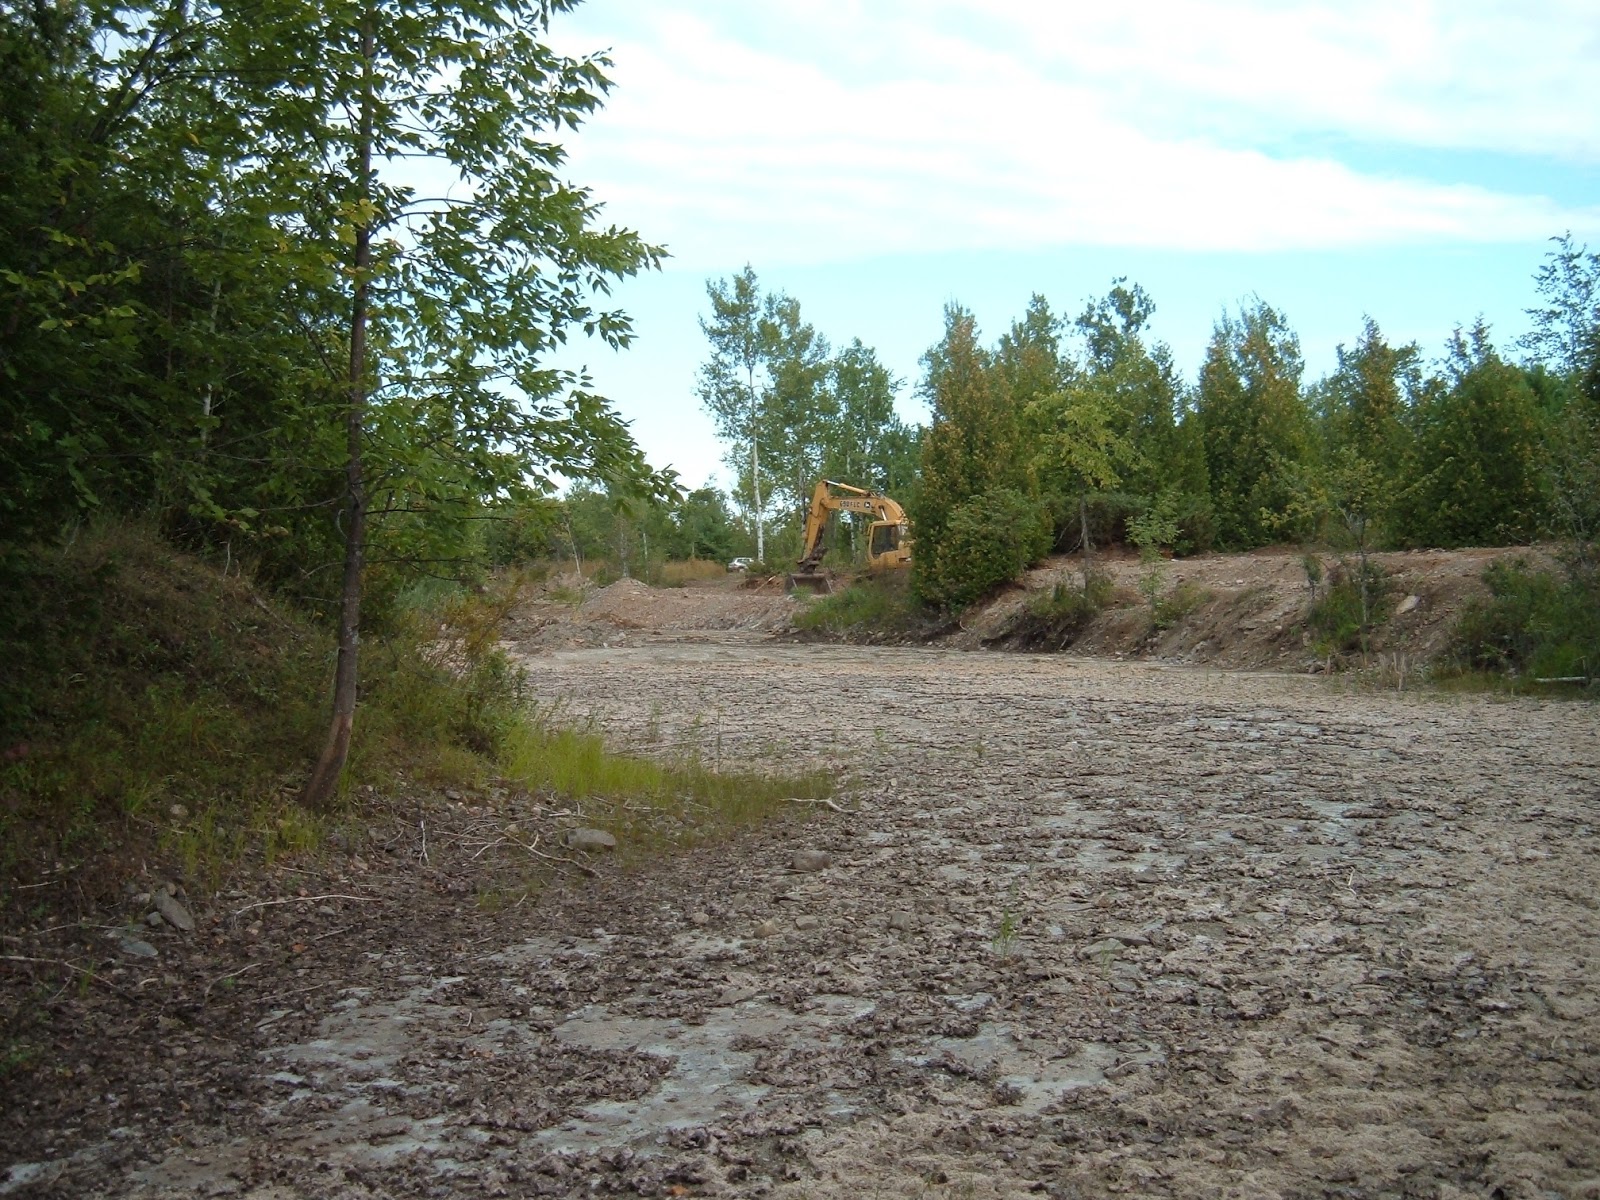
We had to engage a very large excavator to remove the stone and load it on trucks. To do this we found a contractor that needed a large amount of stone for building new roads in a subdivision, where the ground was quite soft and badly needed to be stabilized. Apparently this stone was going to be good for that purpose.

First of all they had to get the top half of the stone pile on the north end removed to create a level surface from which to work, and on which the trucks could drive to reach the south end of the 'pond'. In the picture above, they are just beginning to remove stone on the north end, next to the future house location.
An arsenal of trucks were engaged in the stone removal. I was told that there were 22 trucks involved at one stage of the project. Unfortunately they parked all over the place waiting for their turn to be loaded, which included all of the areas where I had just planted wild flowers! Oh well. The loading went quite fast as the monster loader only took 4 full shovels to fill each truck. But there were a lot of rocks to scoop up and trucks to fill.

The excavator completely removed the stone from the shallow, 6-foot deep south end of the pond, and was about to start on the north 20-foot deep end at the transition point (you can see a little puddle there).

Here you can see that they have made good progress on the east half of the deep end, but have a lot more to do. Note also, when they are stirring up the water that is oozing into the pond, it is quite milky from mixing with the powered limestone, similar to water draining from a melting glacier.

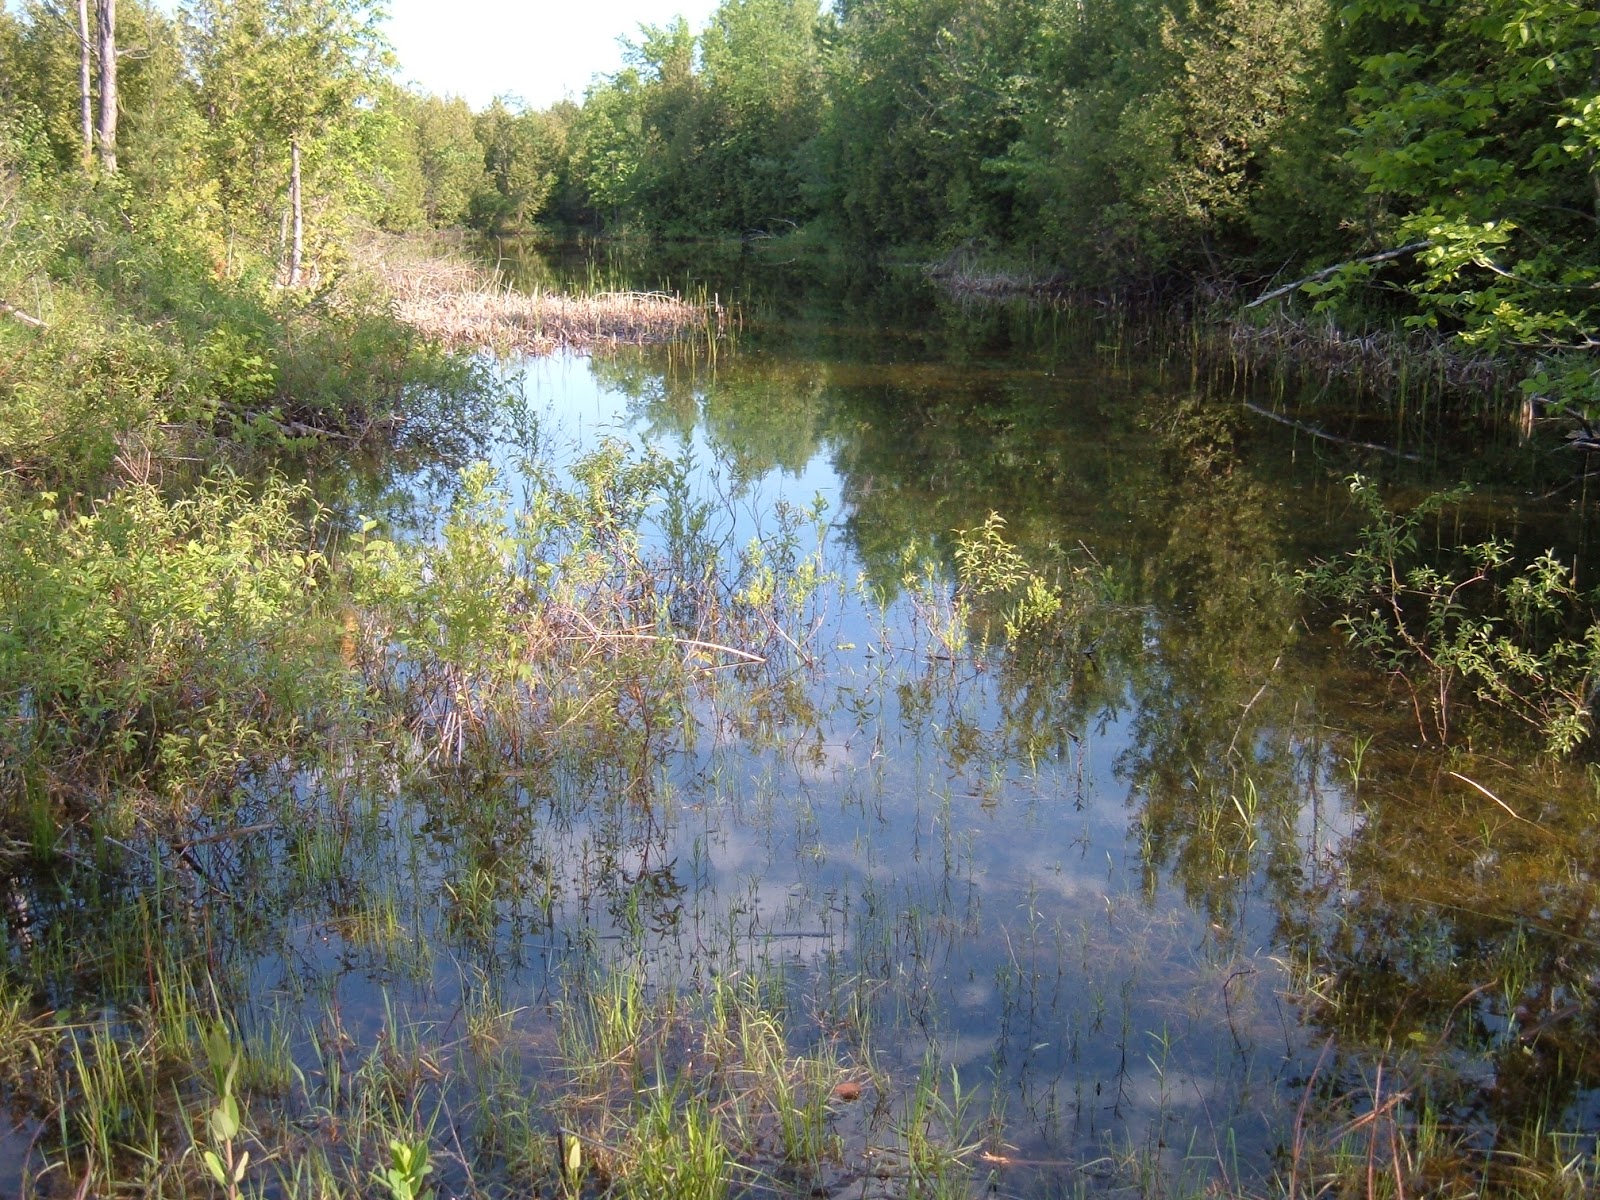
However, this is what the water looks like when it comes into the pond without being agitated by the high hoe. It is very emerald colored (and so we call the new pond Emerald Pond). The emerald color is a result of being exposed to marl, the combination of limestone and clay. It means the water is very clean, almost sterile, much like the Bahamas and the Caribbean. As there is no creek flowing into or out of the pond area, the majority of the water to the pond oozes through the marl cracks in the limestone plates and fills the pond.

Finally, the stone removal did end, after 1.5 years. I was told originally that it would only take about a month. I learned valuable lessons about some contractors and working without a contract - just a hand shake. I believe some contractors must have been trained as politicians. Obviously I live in a different world - that ivory tower world - where a contract wasn't necessary, just a decent honest memory. But that, too, is another story.
Below is the final day of stone removal at the north or house end of the pond. That is a one deep hole. Just look at the fearful posture of the excavator driver examining what's left to do. I don't know if I would be getting back into that machine in that position.

The BIG question now was would the hole fill with water, or did I now own a rock quarry? What would be the quality of the water? Would it support much life or would it be just a swimming hole? ETC....

Happily it filled nicely by the next spring, and it actually overflows for a few weeks every spring through a special pipe in the berm near the surface into the neighboring duck/goose lake that we call Windigo. The amazing thing to me was the speed in which life found it's way into the pond. Many insect species, of course, and stickleback minnows from God knows where. Indeed the turtles showed up almost immediately, as indicated by the painted turtle below. You can see that the turtle is bringing a blood sucker with it attached to it's shell. The trout find that blood suckers are a real edible treat! I suspect many arrivals to the pond had carriers like this.


This spring (2017) we have had a tremendous amount of rain, so that in May, the water level in the pond is again back to the spring thaw run-off levels. In addition, we have been told that we will have 6 more days of rain this next week in early May. How that will play out for the rest of season is hard to forecast, but is very different from last year's unrelenting drought that began in April and extended through August. As you can see, however, the birds are not minding the high water levels and are hanging out and feeding on the grass in the yard!


As the water level today (May 3, 2017) in the pond is over-flowing into our neighboring lake, Windigo, I think that in the next blog, I will describe to you and show you pictures involving the construction of Windigo.
this comment section now works too
ReplyDeleteThat one picture of the pond in summer when it is all green is stunning...no wonder you thought emerald pond!
ReplyDeleteIntermittent connections like this one certainly help explain the sticklebacks!
ReplyDelete